
mla heading visual guide
The MLA heading identifies you and your assignment. It sits at the top left of your first page and tells your instructor exactly whose work they are grading. While the Modern Language Association occasionally updates its handbook, the core requirements for the heading haven't changed in years.
For now, let's focus on what a correctly formatted MLA heading looks like. It's a straightforward block of information, double-spaced, aligned to the left margin, and appearing on the first page of your essay. Think of it as a mini-identification card for your work. Getting this right from the start sets a positive tone and demonstrates respect for the conventions of academic writing. We'll break down each component in the following sections.
the four required lines
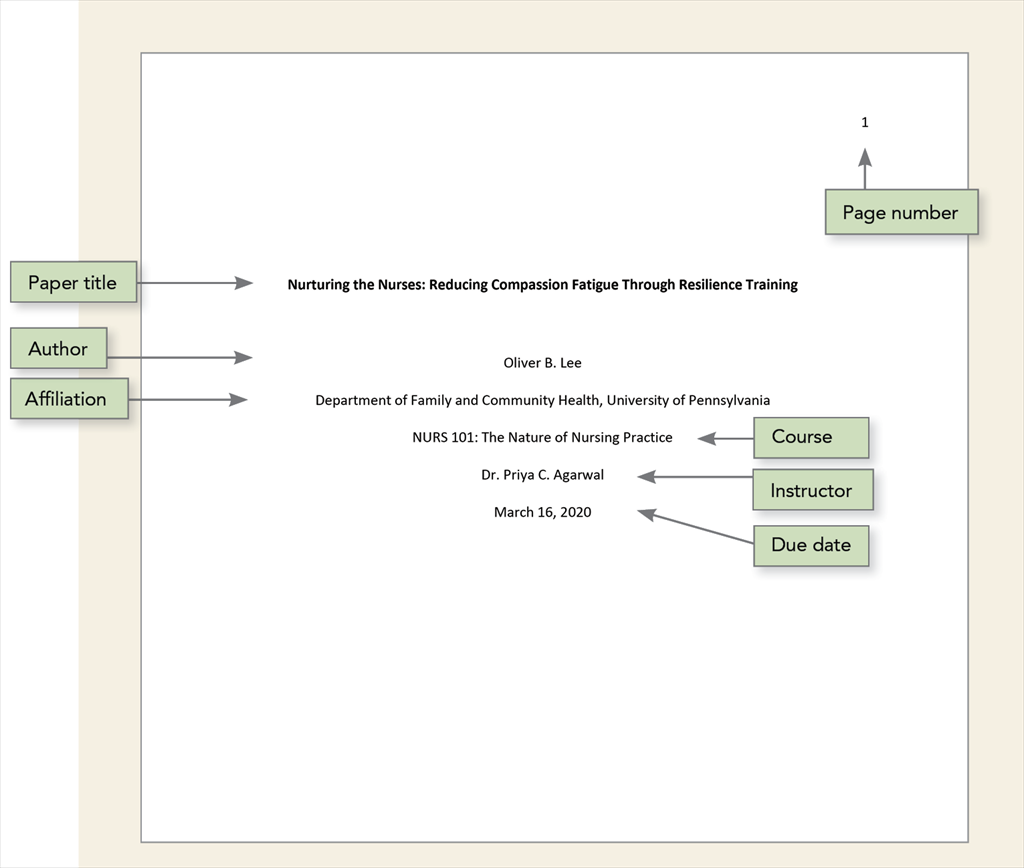
The MLA heading consists of four essential pieces of information, presented in a specific order. They are: your name, the instructor’s name, the course name, and the date. It’s crucial to maintain this order consistently throughout all your MLA-formatted papers.
Write your full name as it appears on school records. Below that, list your instructor’s name using their preferred title, like Dr. or Professor. If you aren't sure, use Professor. The third line is for the course name and section number from your syllabus. The final line is the date.
What about situations where you have a complex name or your instructor has a long title? For hyphenated names, simply include all parts. If your instructor has multiple degrees or professional titles, use the one they typically use in the classroom. When in doubt, a polite email asking for their preferred format is always a good approach. Remember, clarity and respect are paramount.
how to format the date
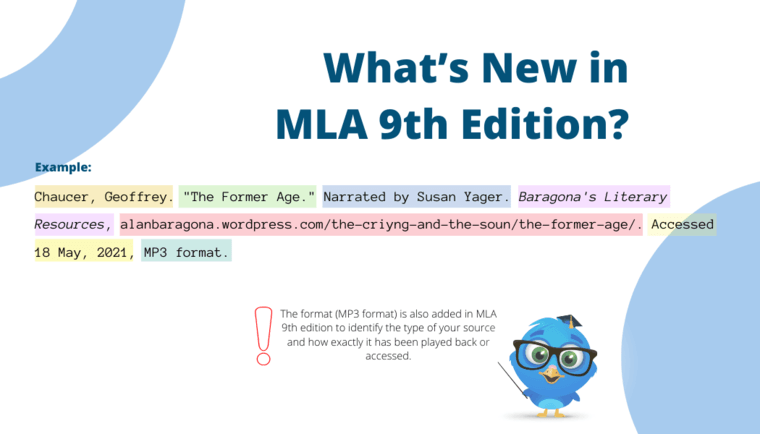
The MLA Handbook allows for flexibility in date formatting, which can sometimes lead to confusion. The most common formats are 15 Oct. 2023 and 15 October 2023. Both are acceptable, but you must choose one and remain consistent throughout the entire paper.
According to the Purdue OWL, the preferred style is to abbreviate months that are longer than four letters. So, January becomes Jan., February becomes Feb., and so on. However, using the full month name isn't incorrect, just less common. The year is always presented in full – no abbreviations here. Consistency is the most important factor; don't switch between abbreviated and full month names within the same document.
Submitting work across different time zones can also cause confusion. Always use the date format that corresponds to your location when submitting the assignment. Don’t try to convert the date to the instructor's time zone. The goal is to provide a clear and unambiguous record of when the work was completed. It's a small detail, but it demonstrates attention to detail and professionalism.
Title Inclusion: Single vs. Multi-Line
Whether or not to include your essay title on the heading is a common question. The MLA Handbook doesn't explicitly require it, but many instructors prefer it. If your instructor does want the title on the heading, it should be double-spaced and centered below the date. There’s no specific rule against bolding or italicizing the title, but it’s generally best to keep it in the same font and style as the rest of the heading – simplicity is key.
What if your title is exceptionally long? Avoid breaking it up onto multiple lines if possible. Try to rephrase it for conciseness. If it’s unavoidable, ensure the line breaks occur at natural points in the title, not mid-phrase. Maintaining readability is crucial. A long, awkwardly broken title looks sloppy and detracts from the overall presentation of your work.
Ultimately, the best course of action is to follow your instructor’s specific guidelines. If they haven’t provided instructions, it’s perfectly acceptable to include the title on the heading, formatted as described above. When in doubt, ask for clarification. It shows initiative and a commitment to doing the work correctly.
Digital Submission: Headers and Footers
In the digital age, the MLA heading often works in conjunction with headers and footers. Specifically, you’ll need to create a header that includes your last name and the page number, aligned to the right margin. This is a separate element from the main heading block we’ve discussed so far. Most word processing programs (like Microsoft Word and Google Docs) have built-in features to automate this process.
In Microsoft Word, you can insert a header by double-clicking in the top margin. Then, type your last name, a space, and the page number. Word will automatically number subsequent pages. In Google Docs, the process is similar: go to Insert > Headers & Footers. Type your last name and page number. Both programs allow you to customize the header’s appearance, but keep it simple and consistent with MLA guidelines.
A common issue is incorrect page numbering. Ensure the header is set to start numbering from page 1. Also, be aware that converting your document to a PDF can sometimes cause the header to disappear or become distorted. Always double-check the PDF to ensure the header is present and correctly formatted before submitting. Another problem arises when using templates – sometimes they interfere with the header settings. Start with a blank document to avoid these issues.
Experiment with different file formats if you encounter problems. If a PDF is causing issues, try submitting a .docx or .rtf file, if allowed by your instructor. Always follow submission instructions carefully and test your file before the deadline.
Troubleshooting Common Errors
Let’s address some frequently made mistakes. Here’s a quick FAQ to help you self-diagnose issues with your MLA heading:
Q: My date format is incorrect. A: Ensure you’re using either 15 Oct. 2023 or 15 October 2023 and consistently using that format throughout the paper. Avoid mixing abbreviated and full month names. Incorrect: Oct 15, 2023. Correct: 15 Oct. 2023.
Q: I’m missing an element. A: Double-check that you’ve included all four core components: your name, the instructor’s name, the course name, and the date. Incorrect: (Missing Instructor Name) John Doe English 101 15 Oct. 2023. Correct: John Doe Dr. Smith English 101 15 Oct. 2023.
Q: My spacing is off. A: The entire heading should be double-spaced. Incorrect: (Single-spaced heading). Correct: (Double-spaced heading).
Q: My header isn’t appearing in the PDF. A: Try converting to a different PDF setting or submitting a .docx file if permitted.
- Include your name, instructor, course, and date.
- Verify date format consistency
- Ensure double-spacing throughout
- Confirm header appears correctly in the final submission format
Beyond the Heading: Full Document Setup
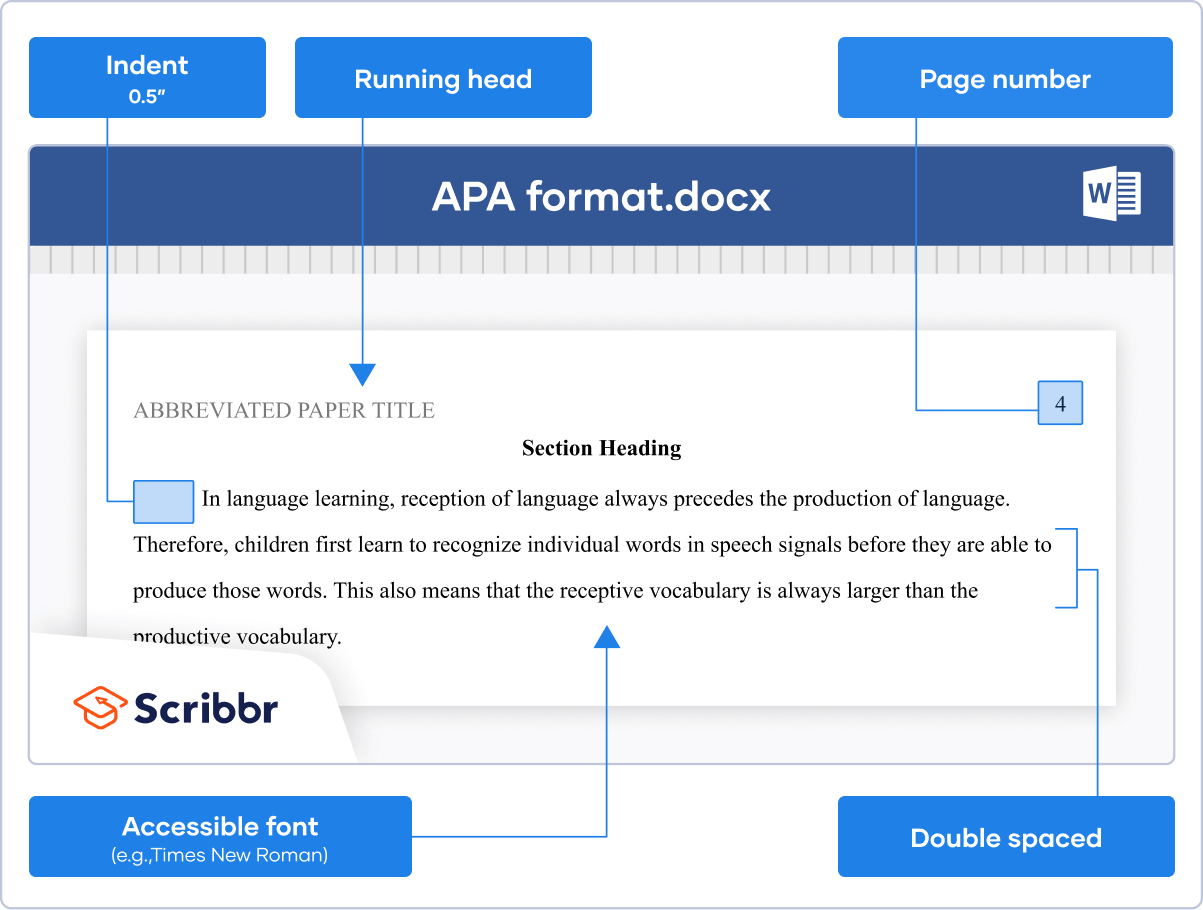
The MLA heading is just the first step in formatting your paper. Remember to also adhere to the guidelines for font (Times New Roman, 12-point), margins (1 inch), and spacing (double-spaced throughout). A properly formatted Works Cited page is also essential. For more comprehensive guidance on all aspects of MLA formatting, explore the resources available on Superior Formatting.
Think of the heading as the foundation of your paper. A solid foundation is crucial, but it’s not the entire structure. Pay attention to all the details – from font size to citation style – to create a polished and professional final product. A well-formatted paper demonstrates respect for your instructor and your audience.

No comments yet. Be the first to share your thoughts!